Disclaimer: If you are installing any version of Windows in a VM, such as XP or 7, you must have a valid product key to install the operating system. A VM is no different than any other system, and licensing rules still apply. Make sure you have a valid installation media and a product key before continuing.
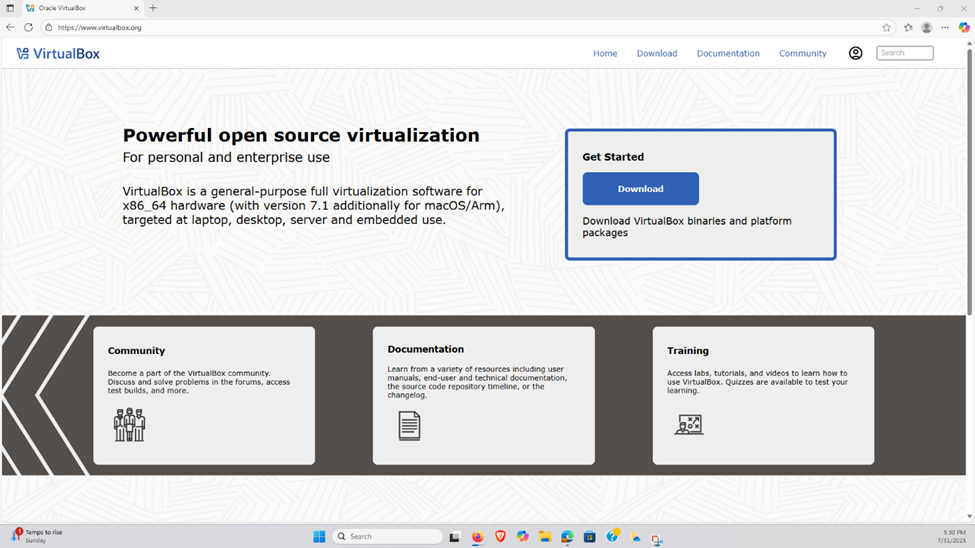
Step 1. Open your choice of browser and head to https://www.virtualbox.org. Once on the homepage, proceed to click the Download button on the right.
Step 2: Under the “VirtualBox Platform Packages” section, click to download the VirtualBox installer for your operating system.

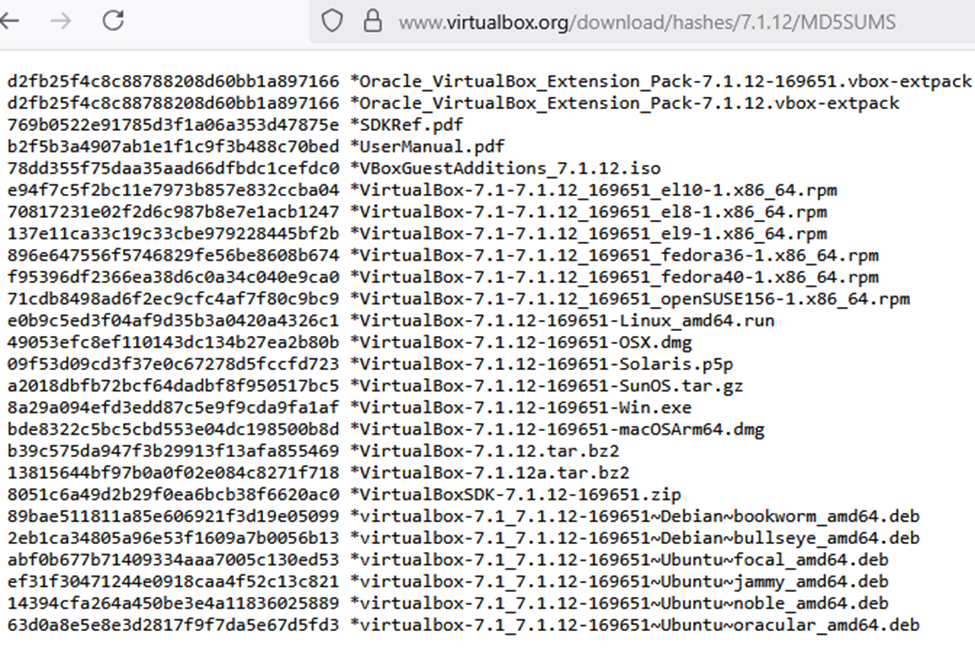
# Optional, but recommended. Scroll to the section hosting the first three white boxes labeled “Change Log”, “File Checksums”, and “User Guide”. Under File Checksums, click to retrieve either the SHA256 or MD5 checksum page. Once redirected to the list of hashes, find the one matching the installer you just downloaded.
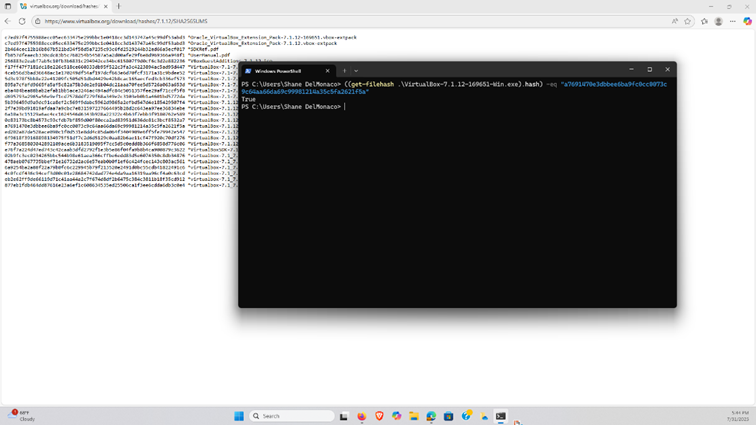
Open an Administrator PowerShell session, and use the following command to check the integrity of the file you downloaded:
((get-filehash .\path_to_your_download.exe).hash) -eq “HASHFROMWEBPAGE”
The output should always be “True”. If it is “False”, then your download was tampered with or damaged at some point in the download process.
Step 3. Locate the installer file for VirtualBox, execute it, and then proceed through the installation, accepting the default options.

Step 4. When installation has completed, launch VirtualBox. Once the home console has loaded, select the “New” button in the top-right menu.
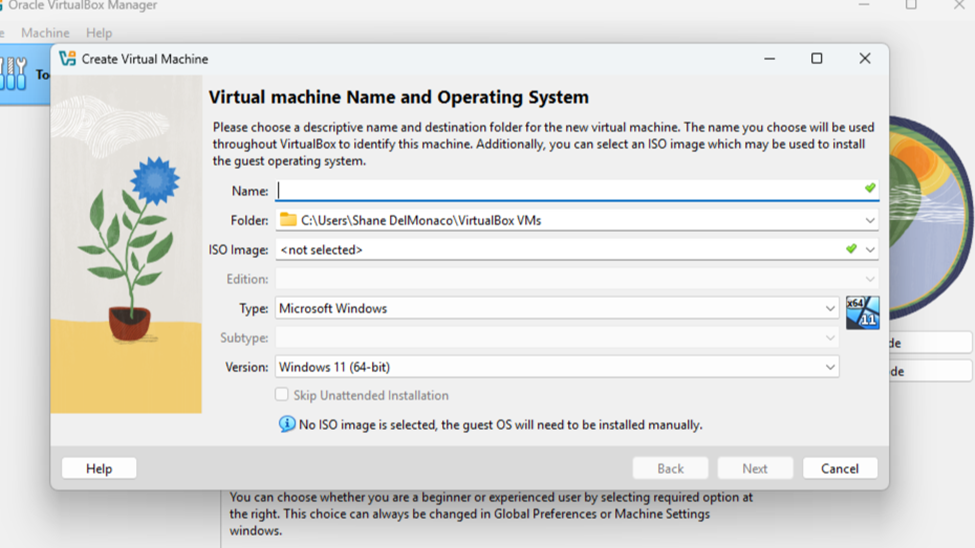
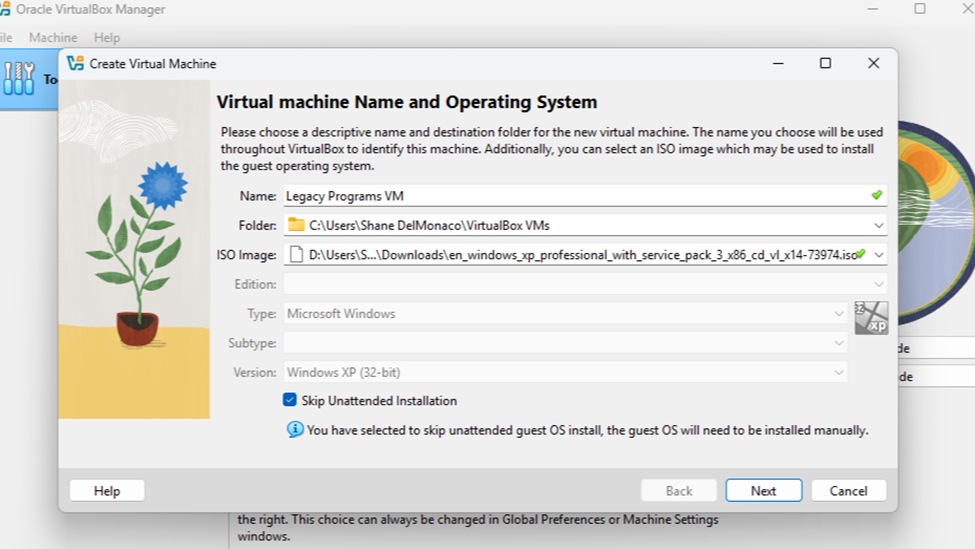
Step 5. You will now begin creating your VM. Title it as you wish and change the location for the VM files if you desire. If you are using an ISO image residing locally, use the drop-down to browse to its location and select it.Check the “Skip Unattended Install” button at the bottom.
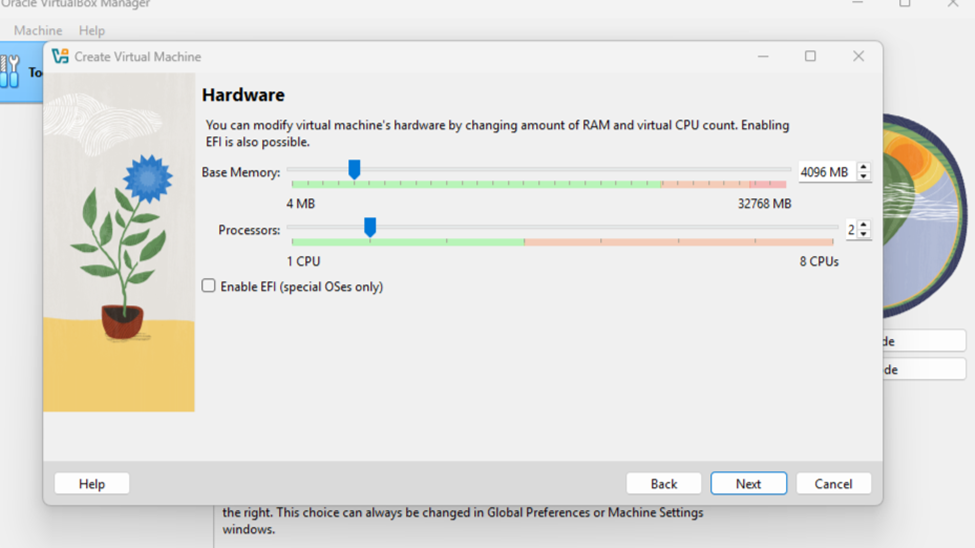
Step 6. You will now begin configuring the virtual hardware options. A minimum of 4GB of RAM and 2 CPU cores is recommended.
Step 7. You will now create the virtual hard drive. Specify the drive’s size based on the size of the operating system and an estimate of the amount of data to be stored. I would recommend at least 50GB.

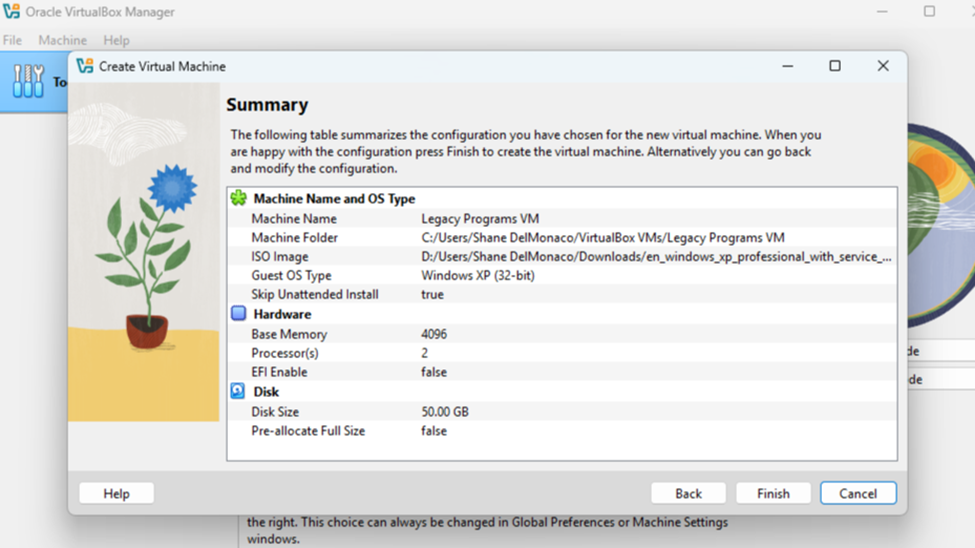
Step 8. Continue through the setup to the Summary screen. As long as everything looks right, click Finish.
Step 9. Start the VM by clicking on the green arrow. The VM should boot into the setup environment for the chosen operating system.
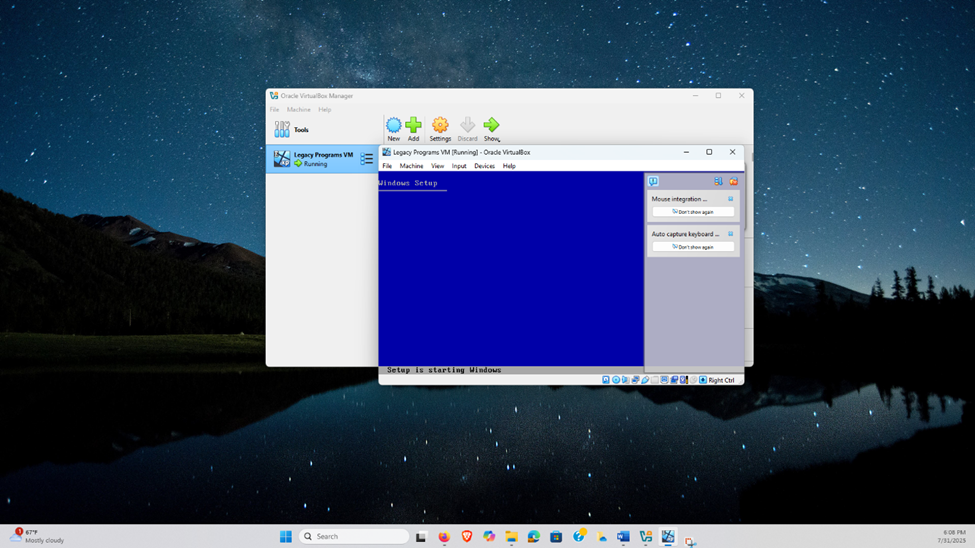
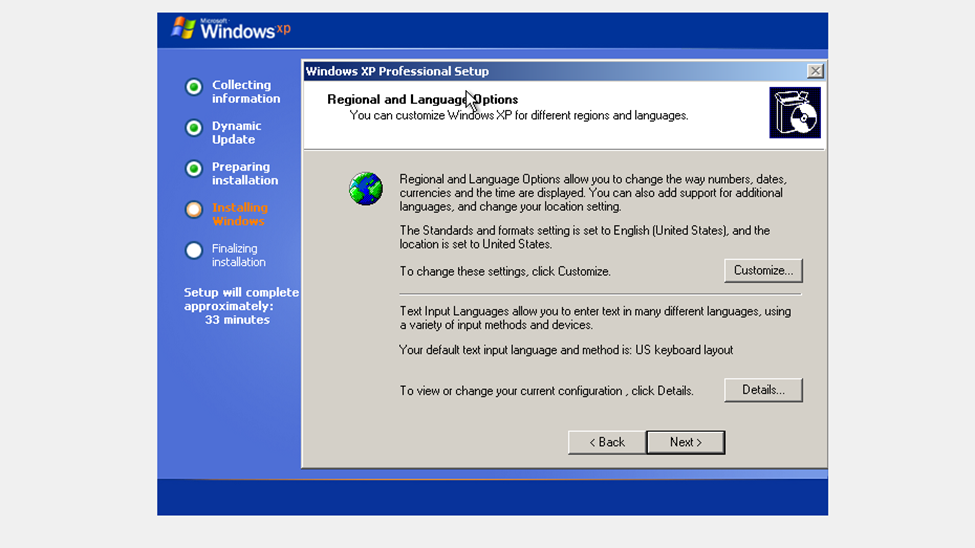
Step 10. From here, proceed through the OS installation steps just as you would on any other computer.
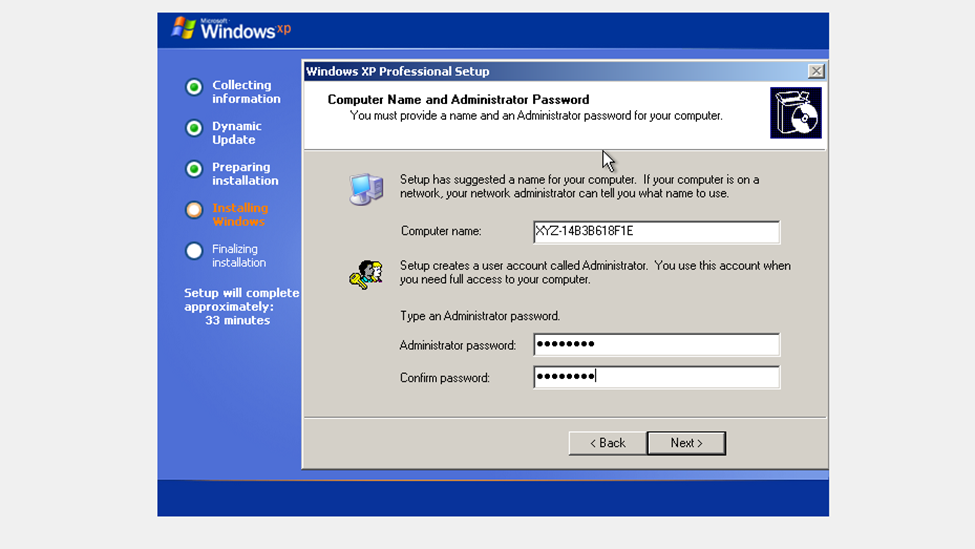
Step 11. Create a user account just as you would on any computer. Since this machine is in a virtualized environment, the password doesn’t need to be as secure as regular workplace user accounts, but it should still be reasonable.
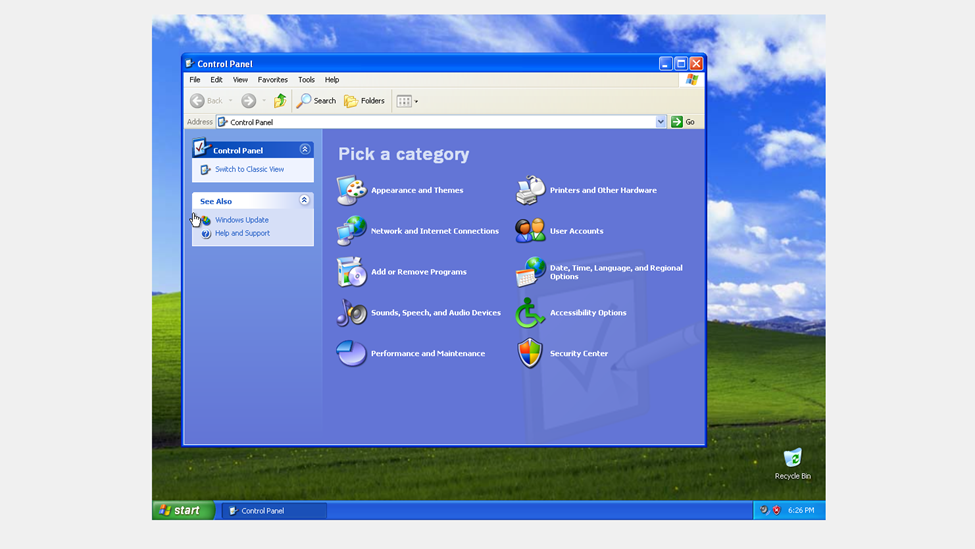
Step 12. Once you have completed Setup, your VM should boot into the desktop environment. You now have a usable machine!
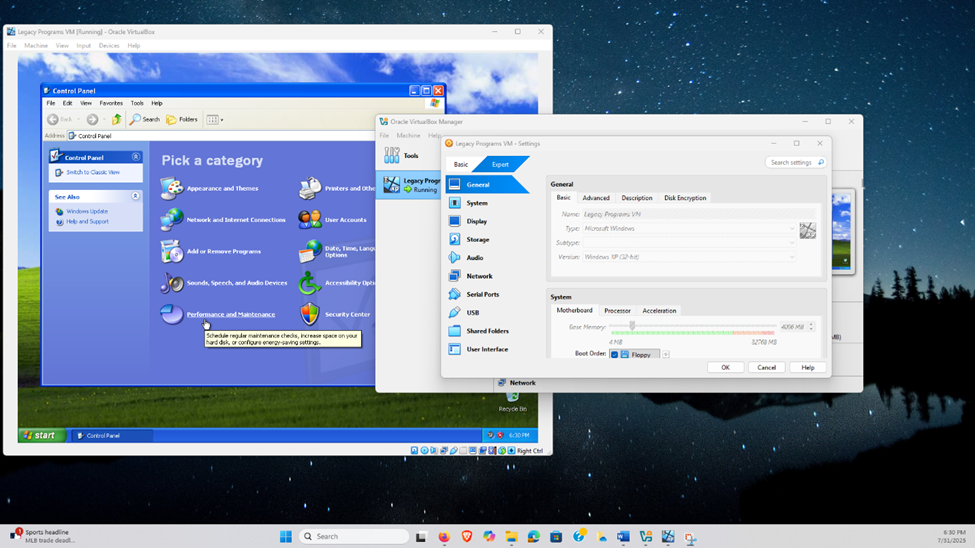
Step 13. After the VM install is completed, you can continue to adjust the VM’s settings according to your needs. This is done by clicking the Settings icon in the VirtualBox Manager.
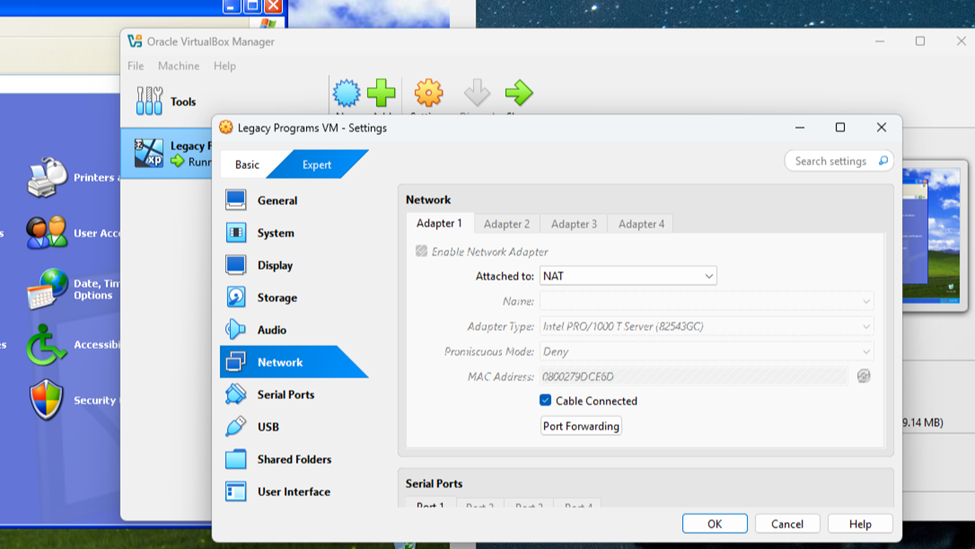
Step 14. Network Settings should be properly configured for the VM’s needs. Unless the legacy software to be installed requires Internet access, change the Adapter Attachment type to “Internal”.
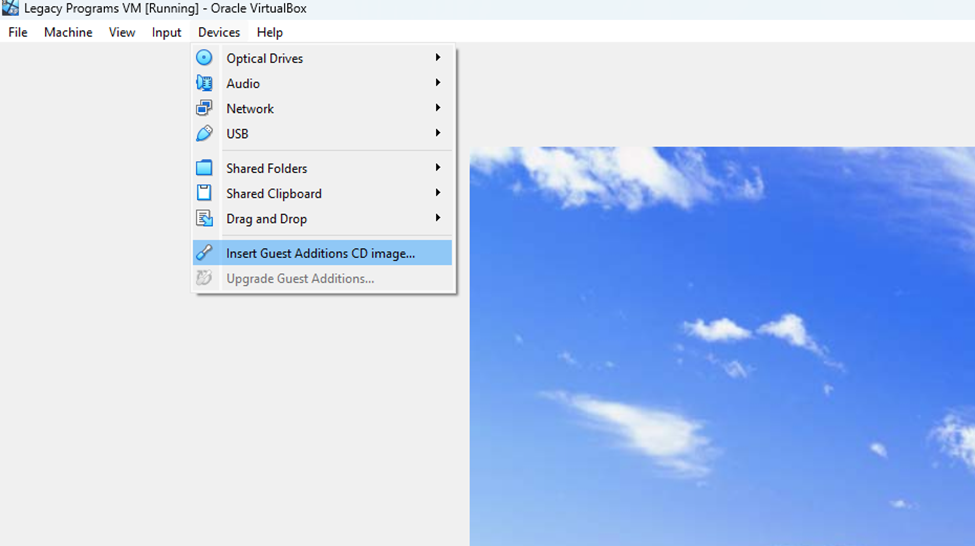
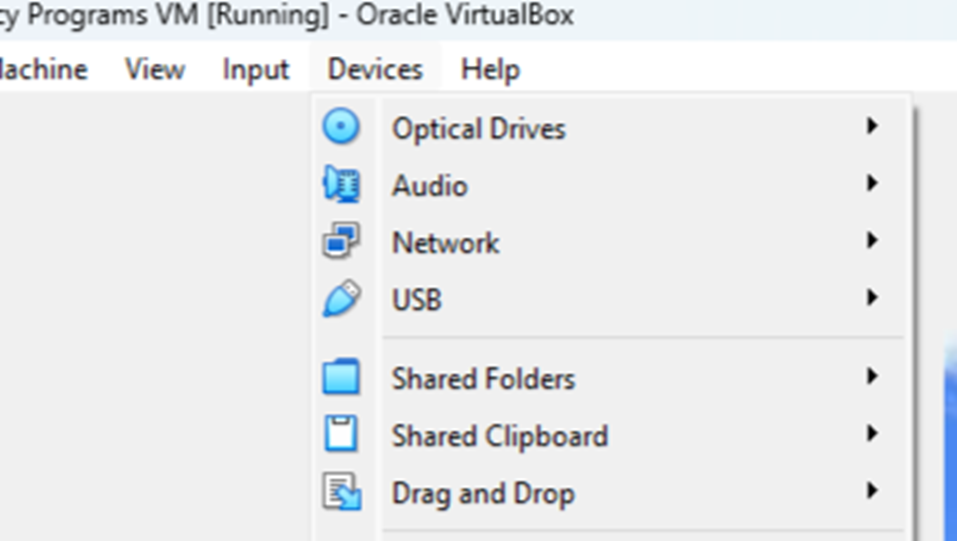
Step 15. To allow the VM to install software and interact with external devices, VirtualBox Guest Additions need to be installed. Navigate to the “Devices” dropdown in the top left menu. Select “Insert Guest Additions CD Image”.
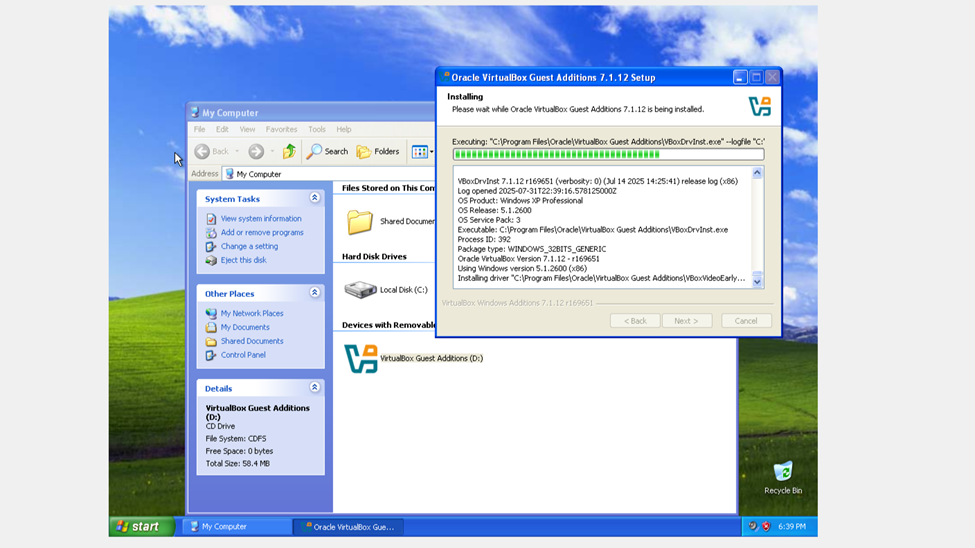
Step 16. Navigate to the operating system’s DVD location and Run the VirtualBox Guest Additions Image.

Step 17. Allow the Guest Additions to be installed on your VM.
Step 18. Once installation is complete, you should be able to select a device category from the Devices drop-down and pass through any devices connected to your host machine.
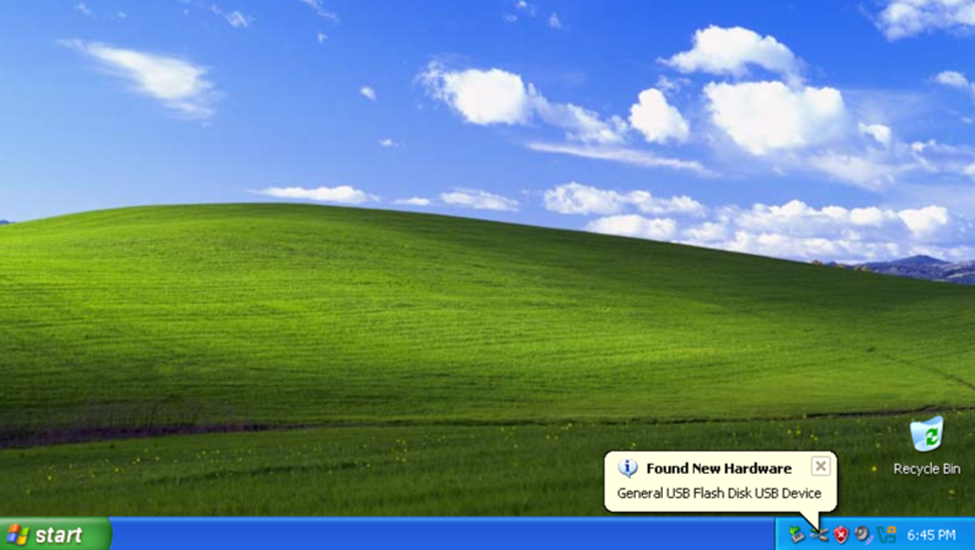
Step 19. Your Guest operating system should recognize the external device after it connects.
Step 20. To install a legacy program, make sure the installation file is located on a connected device, such as a USB drive or product installation CD. Proceed with installation as normal for the legacy program. (For this demonstration, I chose to use an XP-era version of iTunes.)
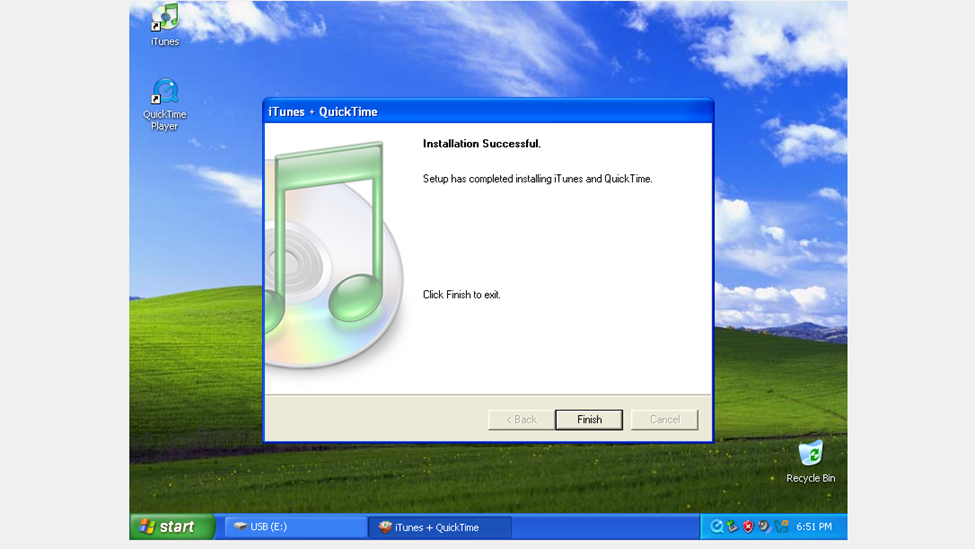
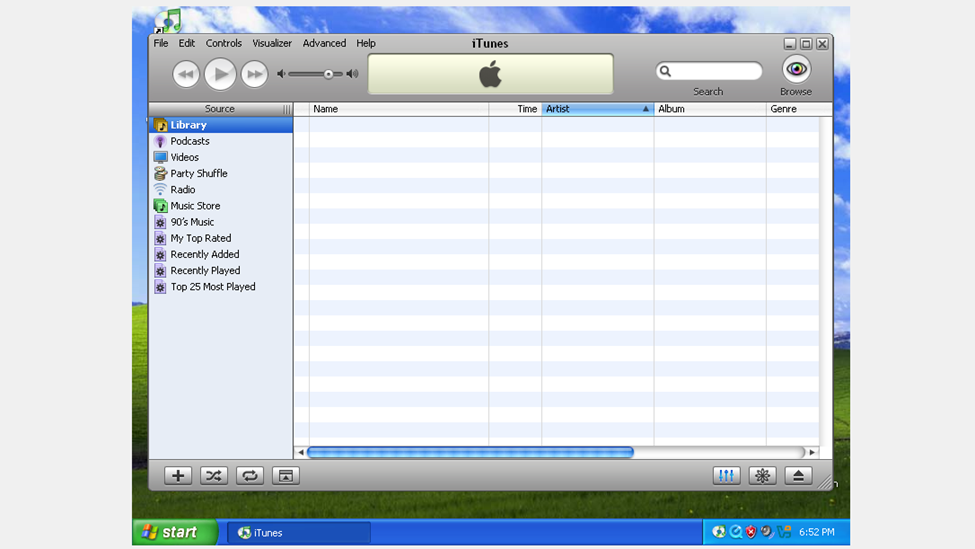
Step 21. When the program has finished installing, you should be able to launch it like normal and configure any desired settings. If a program needs to interface with external devices, connect them to the host machine and ensure the proper drivers are installed on the Guest, then pass the devices through.
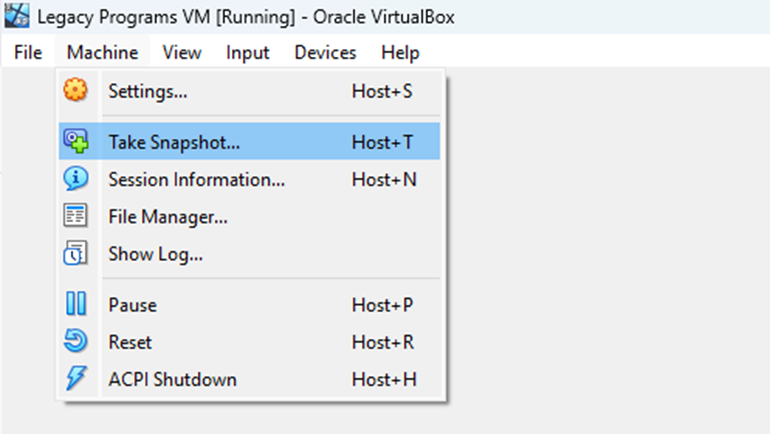
Step 22. Hypervisors contain a feature called “Snapshots”. This allows you to take a “Snapshot” of a VM at a certain point to be used as a baseline. The snapshot is saved and the VM can be reverted to the state in the snapshot if you desire. This could come in handy in case the VM becomes compromised. To take a Snapshot, select the “Machine” drop-down and click “Take Snapshot…”
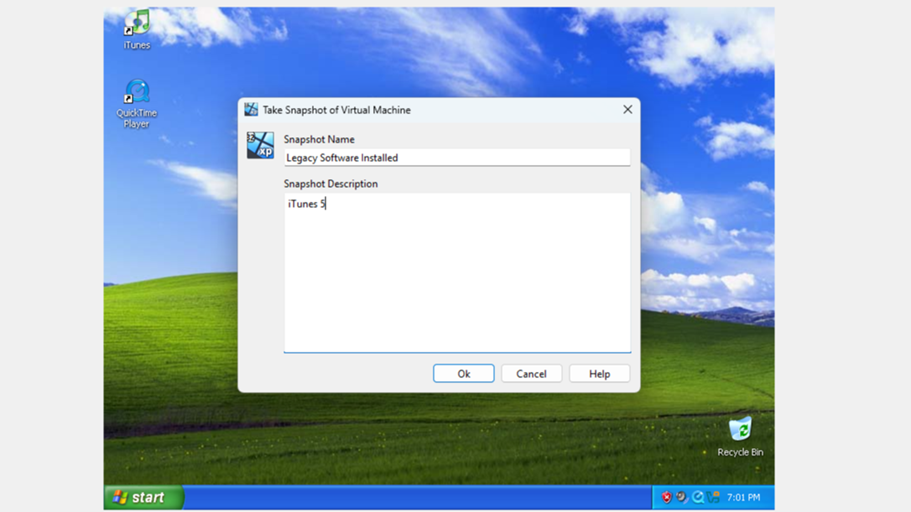
Step 23. Title and describe your snapshot, then click OK. VirtualBox will take a short time to save the VM state into the snapshot.
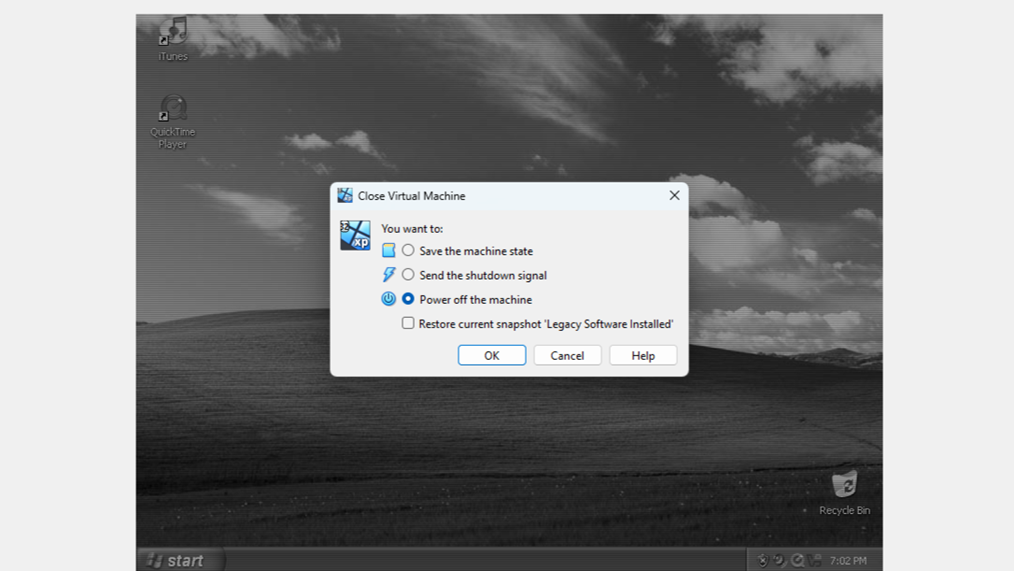
Step 24. The VM can now be used to run the legacy programs in a secure and comfortable environment. You can use the device passthrough and drag-and-drop features to move data back and forth from the host to the guest. Whenever you want to end a session using the VM, exit the program. You will be given options to pause the VM’s state or shut it down completely.